
Set Up HTTPS
LubeLogger runs on Kestrel, which is a cross-platform standalone web server provided by .NET
If you're running LubeLogger behind a reverse proxy(i.e. NGINX), then this walkthrough does not apply to you since the SSL certs will be served up by NGINX instead of Kestrel.
This article covers the step-by-step process to set up HTTPS for a LubeLogger instance.
Docker
If you're running LubeLogger on a Docker instance, first read this article by Microsoft
- Convert the .PEM / .CRT files into .PFX, read this StackOverflow post
- Open and modify the .env file and add the following lines(note that in this example I used bob as the password for the cert)
Note
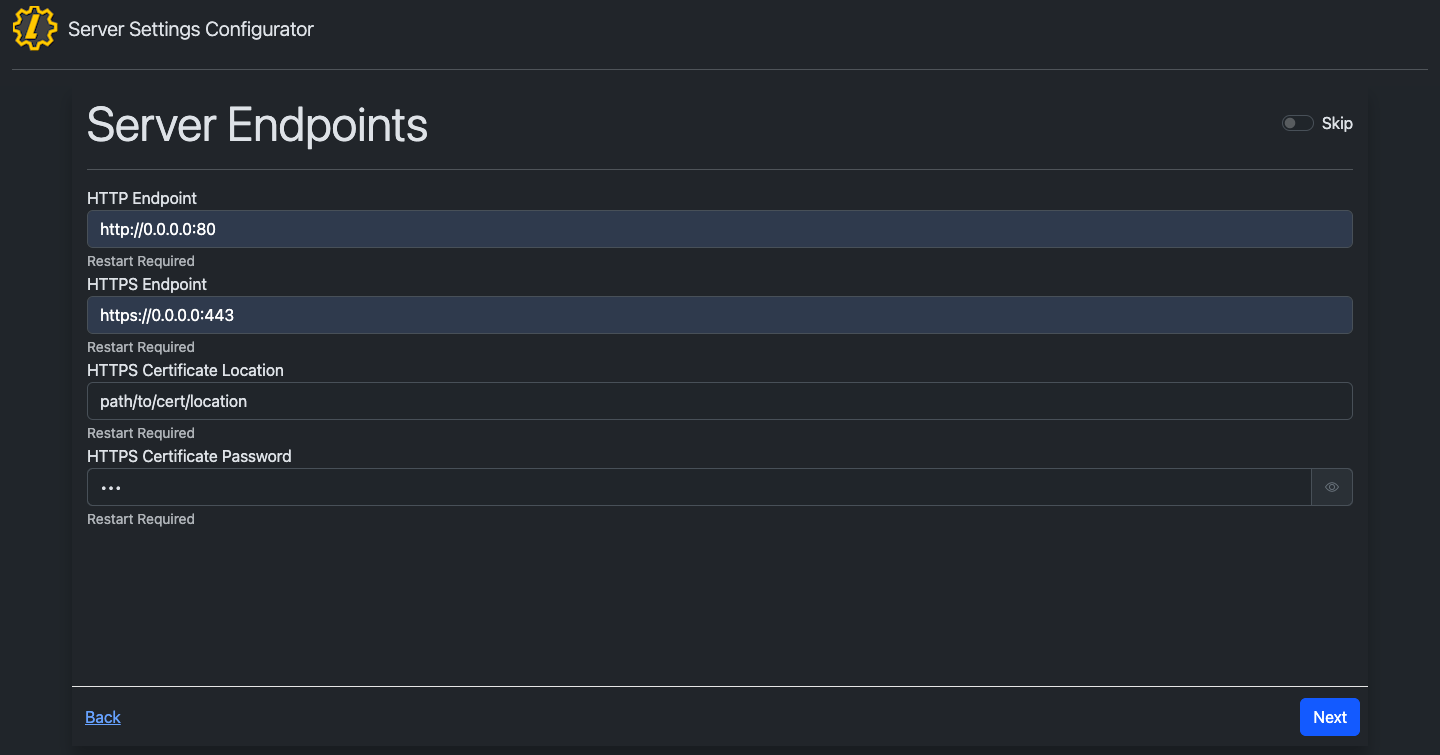
You can use the LubeLogger Configurator for this step
ASPNETCORE_Kestrel__Certificates__Default__Password=bob
ASPNETCORE_Kestrel__Certificates__Default__Path=/https/<yourPFXCertificateName>.pfx
ASPNETCORE_URLS=https://+:443;http://+:80
- Open and modify docker-compose.yml. You will need to bind a new volume to the Docker container so that Kestrel can access the certificate file.
volumes:
- ./https/:/https:ro - Check the port bindings to ensure that traffic is being forwarded to port 443
ports:
- 443:443 - Run
docker-compose up -dto start up the container andhttps://localhostwill now have a valid cert.
Windows
If you're running LubeLogger as the standalone Windows executable:
- Convert the .PEM / .CRT files into .PFX, read this StackOverflow post
- Navigate to the Server Settings Configurator and click Next until you get to "Server Endpoints"
 3. Save the Settings by clicking to the end of the Server Settings Configurator and click "Save" 4. Restart the app and
 https://localhost will now have a valid cert.