Postgres
For users that desire additional scalability for their backend, LubeLogger now supports a PostgreSQL backend.
Configuration
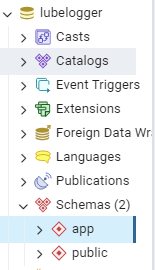
To configure LubeLogger to use PostgreSQL, you must first have at least one database for lubelogger to use. On LubeLogger versions newer than 1.3.5, the app schema will be automatically created, on previous versions you will need to manually create the schema.

Once that is done, simply inject the environment variable POSTGRES_CONNECTION with your connection string, example:
Host=<yourserveraddress:port>;Username=<yourusername>;Password=<yourpassword>;Database=<databasename>;
LubeLogger will then automatically create the tables it needs, all records will then be saved and loaded from Postgres tables from now on.
Backups
Once you have switched over to Postgres, LubeLogger's built in and backup function will only back up images, documents, and the server config. You are responsible for maintaining backups of the DB records.
Database Migration
A tool is provided to ease the migration process between LiteDB and Postgres. This tool can be found at the /migration endpoint and is only accessible when a Postgres connection is provided.

Importing to Postgres
To transfer all your existing data from LiteDB to Postgres:
- Create a backup using the "Make Backup" feature in the Settings tab.
- Extract the zip file.
- You should see a folder named "data" in the extracted folder
- Inside the data folder will be a .db file named
cartracker.db - Navigate to the Database Migration tool
- Click "Import to Postgres"
- Select the
cartracker.dbfile - Your data will be imported into your Postgres DB, and you may double check that the DB has been imported successfully using a Postgres DB Administration Tool.
Exporting from Postgres
In the event that you need to transfer all your data back onto a LiteDB database file from Postgres, you may do so using the Database Migration tool:
- Navigate to the Database Migration Tool
- Click "Export from Postgres"
- Extract the downloaded zip file and you should find
cartracker.dbin it. - Create a backup using the "Make Backup" feature in the Settings tab.
- Extract the zip file.
- You should see a folder named "data" in the extracted folder, if not, create it.
- Place
cartracker.dbinside the "data" folder - Re-zip the extracted folder
- Restore the backup using the "Restore Backup" feature in the Settings tab.
- Make sure you remove the PostgreSQL connection from the environment variables so that all future changes will be saved in LiteDB.
