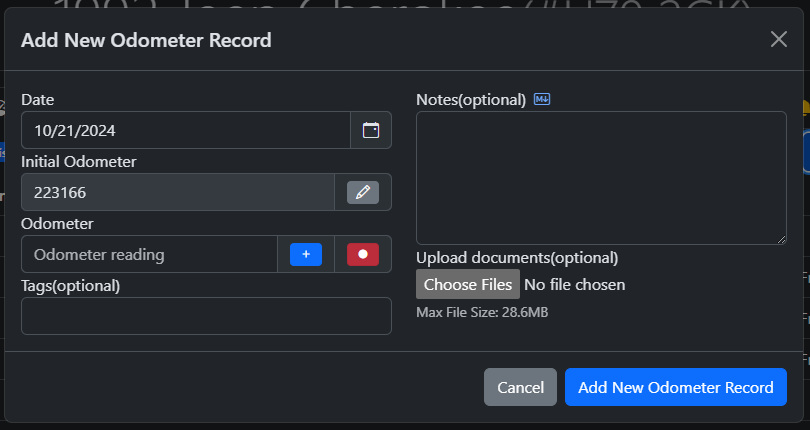
Onec you have all the configurations above enabled, when you click on "Add Odometer Record", you will now see a red record button right next to the "Increment Odometer" button
+
+
+
+
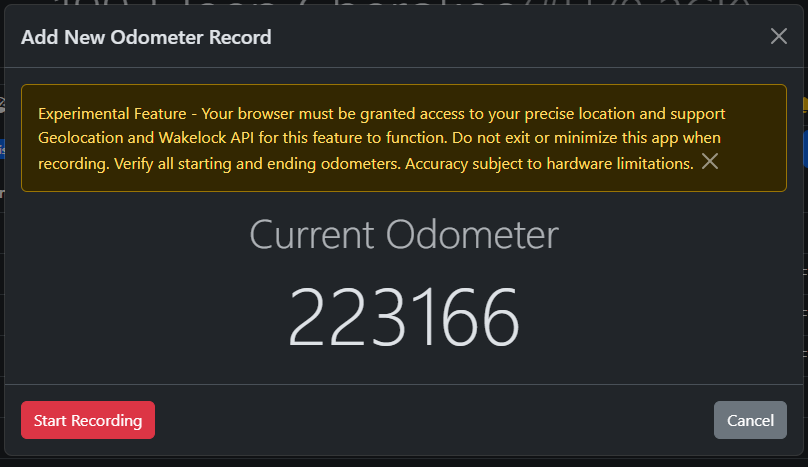
Click on the record button and you will be taken to record trip modal:
+
+
+
+
Read the Disclaimer. Click "Start Recording" and drive around, you should see the odometer increment when you've driven about a mile or so(subject to device accuracy).
+
+
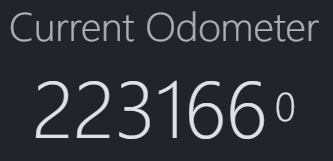
Clicking on the current odometer reading shows the sub-odometer reading. Note that the sub-odometer reading is never saved as LubeLogger does not support decimals for odometer reading. This display is purely for checking if the tracking functionality is working.
+
+
+
+
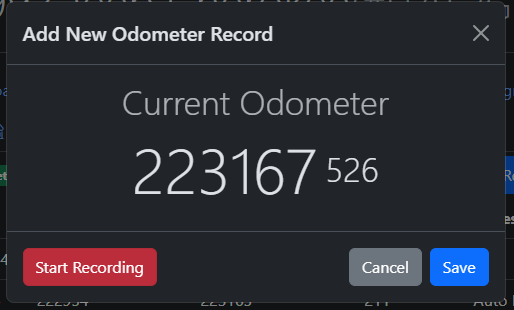
Once you are done recording your trip, click the "Stop Recording" button. If the final odometer reading is different from the initial odometer reading, then a "Save" button will be displayed:
+
+
+
+
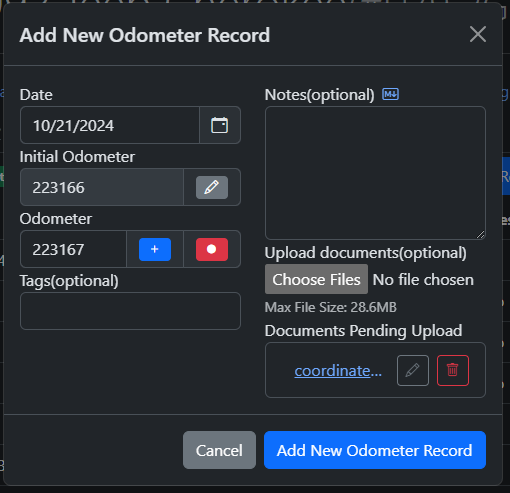
Click "Save" and you will be brought back to the "Add Odometer Record" screen, the odometer reading field will be updated, and there will also be a file that is pending upload named "coordinates.csv". If you add this odometer record, the file will be uploaded.
+
+
+
+
The coordinates.csv file contains a list of coordinates saved from the trip in 0.1 mile or km increments. To visualize the file, simply upload it to a coordinate plotter such as GPS Visualizer and it will plot the coordinates out on a map.
